How to Redact a PDF (Permanently Remove Sensitive Text, No Upload)
The black rectangle you draw over text in Preview or Word is not redaction. The original text is still in the file, selectable and copyable in seconds. This is how governments, law firms, and courts have accidentally leaked sensitive data. Here is how true redaction works, and how to do it free in your browser without uploading your document.
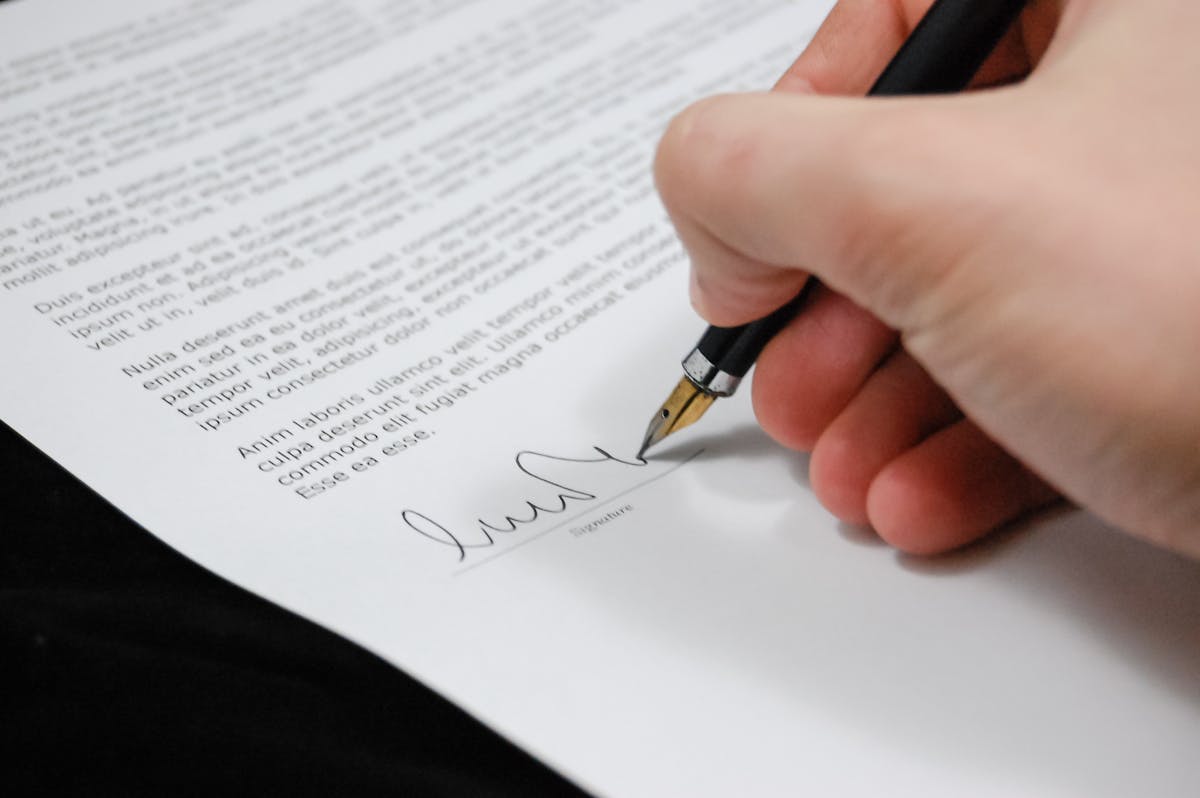
Table of Contents
The dangerous mistake everyone makes
You have a contract to share. There is a pricing section you cannot send. So you open it in Preview on your Mac, grab the annotation tool, draw a black rectangle over those lines, export as PDF, and email it. Job done. Sensitive information hidden.
Except it is not hidden at all. Open that exported PDF. Click on the black box. Press Command-A to select all, or just click and drag across the blacked-out region. In a large number of cases, you can select the text underneath, copy it, and paste it into any text editor. The black rectangle is an annotation overlay, a visual layer drawn on top of the document. The underlying text data is completely intact in the PDF file.
This is not a hypothetical. In 2011, the U.S. District Court for the Northern District of California published a legal filing where Apple had used this exact method to black out confidential figures in a Samsung patent dispute. The underlying numbers were trivially extractable from the PDF. Similar incidents have happened with government reports, intelligence briefings, and corporate filings. The NSA, the DOJ, and multiple UK government departments have published documents with recoverable “redactions” done this way. In one notable case, a redacted court document revealed the full names of individuals it was meant to protect, because the redaction was a black box overlay rather than genuine content removal.
The same failure mode applies whether you use Preview on Mac, Microsoft Word, Foxit Reader, or the annotation tools in most PDF viewers. If the tool adds an overlay without removing the underlying data, the result is not a redacted document. It is a document with a black sticker on it.
You can test this yourself in thirty seconds
Take any PDF that has selectable text. Open it in Preview on Mac. Use the annotation toolbar to draw a filled black rectangle over a paragraph. Go to File and choose Export as PDF. Open the exported file. Now press Command-A to select all text, then Command-C to copy it. Paste into TextEdit or any editor. The text you covered is there. Every word.
If you are using Windows, try the same with Microsoft Word or Edge's PDF annotation: draw a shape over text, save, reopen, and attempt to select through the shape. The result is the same. This is not a bug in Preview or Word. It is how PDF annotations work by design: they are a presentation layer, not a data removal operation.
How true redaction actually works
True redaction does not add a layer on top. It permanently destroys the underlying content. The standard approach is to render each page of the PDF to a flat raster image, draw the black boxes directly onto those rendered images, and then write a new PDF file built entirely from those images.
The result is a PDF that looks identical to the original from a visual standpoint, with the redacted regions appearing as solid black boxes, but has no text layer whatsoever. There is no font data, no character encoding, no unicode codepoints, no text stream. There is nothing to select, nothing to search, nothing to copy, and nothing to recover. The text is gone because it was never encoded in the output file.
How SammaPix implements this
I built SammaPix's PDF Redact tool to do exactly this, entirely inside your browser. Here is the actual sequence of operations:
- Load and render. The PDF is loaded locally in your browser using a PDF rendering engine. Each page is drawn to an HTML Canvas element at high resolution.
- Mark regions. You draw rectangles over the content you want to remove. These are displayed as semi-transparent overlays while you work, so you can see what you are marking.
- Bake and flatten. When you confirm, the tool draws solid black rectangles onto the Canvas pixels at every marked region. The text under those pixels is overwritten at the image level, not just covered.
- Build a new PDF. Each Canvas is exported as a PNG image and assembled into a new PDF file. This new file contains only images, no text encoding, no original fonts, no original data structures from the source document.
- Download locally. The output PDF is offered as a direct download from browser memory. The file never touched a server at any stage.
The entire process runs in your browser tab. No network request carries your document. The only thing the server provides is the tool's JavaScript code when the page loads. After that, everything is local.
Permanently remove sensitive text now
Draw boxes, flatten to image, download. The content under the boxes is permanently gone, not just covered. Runs in your browser. No upload. No Acrobat license required. Free.
Open the Redact PDF tool, FreeRedaction methods compared: safe vs unsafe
There are several methods people use to try to hide content in a PDF. Here is an honest comparison of what each one actually does and whether the content is truly removed:
| Method | How it works | Is content truly removed? | Risk |
|---|---|---|---|
| Black box in Preview or Acrobat annotation layer | Draws a visual overlay on top of the page. The text below is unchanged in the PDF data structure. | No. Text is fully selectable and copyable through or around the box. | High. Easily bypassed. |
| Delete text in Word or a PDF editor | Removes the text from that layer, but often leaves layout gaps, placeholder characters, or change-tracking history that can be recovered. Metadata may still reference deleted content. | Partially. Risky if track changes or document history is not also cleared. | Medium. Depends on tool and workflow. |
| Print to paper and rescan | Converts the document to a physical image by printing, then scans back to a digital image. All original data structures are gone. | Yes, if the physical black-out is applied before scanning. Extremely slow. Output quality degrades significantly. | Low. But very slow and lossy. |
| Flatten to image in browser (SammaPix) | Renders each page to a Canvas image, draws solid black over marked regions at pixel level, writes a new image-based PDF. No text layer is created. | Yes. No text data exists in the output file. Nothing to select or recover. | None. Content is permanently gone. |
| Adobe Acrobat Pro Redact feature | Marks regions then applies redaction, removing text data from those regions and flattening the result. Requires a paid subscription of roughly 25 dollars per month. | Yes, when the Apply Redactions step is completed, not just marked. | None, if used correctly. Expensive. |
The key insight from this table is that the two approaches most people reach for first, the black box overlay and deleting text in an editor, are both unreliable. The flatten-to-image approach is the only one that is both fast and reliably safe.
A note on Acrobat's own annotation tool vs its redaction feature
Even Adobe Acrobat Pro has this confusion baked in. Acrobat has two separate things: an annotation tool that lets you draw shapes (including filled black rectangles) as overlays, and a dedicated Redact tool under the Tools menu. Only the dedicated Redact tool actually removes underlying content. The annotation tool does not. Many people who own Acrobat Pro have used the annotation tool, assumed they are redacting, and shipped documents that are not truly redacted.
What to redact by document type
Knowing which fields to redact in each type of document saves time and reduces the chance of missing something. Here is a practical reference for the most common document types:
| Document type | Typically redact | Typically keep |
|---|---|---|
| Contract | Pricing, payment terms, party names, proprietary clauses, penalty amounts | Scope of work, general terms, effective date, signature blocks (when appropriate) |
| Bank statement | Account number, sort code or IBAN, full balance, specific transactions not relevant to the purpose, full name and address | Relevant transaction lines, statement period, bank name |
| Medical record | Patient name, date of birth, NHS or insurance number, unrelated diagnoses or medications, treating clinician personal contact details | The specific clinical data relevant to the disclosure purpose |
| HR file (employment) | Salary, home address, national insurance or tax ID, unrelated disciplinary history, personal references | Role title, start date, employment terms relevant to the query, performance data relevant to the context |
| Legal discovery document | Attorney-client privileged communications, third-party personal data, commercially sensitive terms not relevant to the claim | The content responsive to the discovery request |
| Tax return or financial filing | Tax identification number, social security or national insurance number, unrelated income sources, bank account details | The specific figures and schedules relevant to the submission or query |
These are general guidelines. The right answer always depends on why you are sharing the document and with whom. When in doubt, redact more rather than less. It is easy to share an additional unredacted copy if needed, and very difficult to un-share sensitive information once it is out.
How to redact a PDF in your browser, step by step
Here is the full walkthrough for using SammaPix PDF Redact to permanently remove sensitive content from a PDF without uploading it:
- Go to sammapix.com/tools/redact-pdf in any modern browser: Chrome, Safari, Firefox, or Edge. No account, no signup.
- Drop your PDF onto the tool or click to browse and select it. The file is loaded locally. Nothing is sent to any server.
- Navigate to the page with sensitive content. The tool renders each page. Use the page navigation to go to the section you need to redact.
- Draw rectangles over the content to remove. Click and drag on the page to draw a black box over each region. You can draw multiple boxes on the same page and on different pages. The boxes are displayed as overlays at this stage so you can see what you are marking.
- Confirm and apply. When you have marked all the regions, click the redact button. The tool renders every page to an image, bakes the black boxes into the pixel data, and builds a new PDF from those images.
- Download the redacted PDF. The output file is offered as a direct download. Open it and try to select text on the formerly sensitive pages: there is nothing to select. The content is gone.
How to verify the redaction is real
After downloading the redacted PDF, do two tests. First: open the file, try to click on the black boxes, and attempt to select text. You should find that no text is selectable anywhere on the affected pages, because the entire page is now an image. Second: open your browser's developer tools, go to the Network tab, and while you were using the tool, check whether any request carried your PDF data outbound. You will find none. Both tests confirm that the redaction is genuine and the document stayed on your device.
Try it on your own document
Load a PDF, draw boxes, apply. The output has no text layer: nothing to select, copy, or recover. Free. No upload. Works with contracts, statements, medical records, and any other PDF with text.
Why no-upload matters for the people who redact
Think about who actually redacts documents for a living: lawyers, HR managers, accountants, medical staff, compliance officers. These are precisely the people whose documents are the most sensitive and the most regulated. They are also the people most likely to be in violation of GDPR, HIPAA, or professional confidentiality rules if they upload a client document to a random consumer tool.
GDPR and the upload problem
Under GDPR Article 28, if you transfer personal data to a third party for processing on your behalf, that party must be a vetted data processor under a signed Data Processing Agreement. Uploading a client's contract or bank statement to an online PDF tool to redact it means you have transferred personal data to a processor. If that processor is not under a DPA with your organisation, you are potentially in violation. Most consumer tools do not offer DPAs to individual users. Using a browser-based tool that never receives the data sidesteps this entirely: no transfer means no processing agreement is needed.
Attorney-client privilege and legal confidentiality
Uploading a client document to a third-party server may constitute a disclosure of privileged information depending on jurisdiction and context. Bar associations in multiple countries have issued guidance cautioning lawyers about cloud-based document processing services. The safest approach is one where the document never leaves the lawyer's device: which is exactly what a browser-based tool provides.
Healthcare and HIPAA
HIPAA in the United States requires that any service that processes Protected Health Information on behalf of a covered entity signs a Business Associate Agreement (BAA). Consumer PDF tools are not HIPAA Business Associates and typically do not offer BAAs. Processing a patient record through such a tool is a potential HIPAA violation. A browser-based tool where the data never leaves the device avoids this exposure entirely: the tool is never in possession of the PHI.
I built SammaPix with the no-upload constraint as a first principle, not as a feature added later. The tools that handle the most sensitive documents (redact, pdf-split, pdf-merge, exif) all run locally because the people using them have the most to lose if a document leaks. See also the related article on splitting PDFs without uploading, which covers the same privacy principle in depth for the split use case.
The part people forget: metadata is not redacted
Redacting the visible content of a page removes the text you blacked out. It does not remove the file-level metadata that every PDF carries. That metadata includes:
- Author and creator fields: the name of the person who created the document, often drawn from the operating system user account.
- Creation and modification dates: when the document was originally created and last edited.
- Application name: the software used to create or export the PDF, such as Microsoft Word 16.x or Adobe Acrobat 2024.
- Custom document properties: some applications embed additional fields: project codes, template names, or internal identifiers.
None of this is visible when you read the document. All of it is visible when someone opens the document's properties in Acrobat, or runs any metadata extraction tool on the file. In a legal discovery context, document metadata is often as important as document content. In a general privacy context, the author field can identify a specific person even when the document content is fully redacted.
For complete privacy, redact the visible content first, then use SammaPix's EXIF and metadata tool to strip the file-level metadata from the output. Both tools run in the browser. Neither uploads your file.
Redact vs blur: which operation do you need?
People sometimes use “redact” and “blur” interchangeably, but they refer to different operations on different content types. Here is the practical distinction:
Use Redact for text-based documents
If you are working with a PDF, a scanned form, a contract, a statement, or any document that primarily contains text, use SammaPix PDF Redact. The tool is designed for the document workflow: load a PDF, mark regions, get a redacted PDF. The output is also a PDF, suitable for sharing as a document.
Use Blur and Censor for photos and images
If you need to hide a face in a photo, obscure a license plate, cover a screen visible in a screenshot, or blur any region of an image file, use SammaPix Blur and Censor. It works on JPEG, PNG, WebP, and other image formats and applies a true pixel-level blur (Gaussian or pixelate), not a black box overlay. The output is an image file.
Overlap: photos embedded in PDFs
If your PDF contains both text and embedded photos, and you need to redact a face in one of those photos, the PDF Redact tool still works: it renders the entire page (including any embedded images) to a canvas and lets you draw boxes over any region, including photo regions. The result is the same: a flat image-based page with the marked region permanently blacked out.
The difference between the tools is the input and output format, and the specific workflow. For standalone images, use blur. For PDFs, use redact. Both are browser-based, no upload, free.
The honest trade-off: image-based output
True redaction through page flattening comes with one significant trade-off that you should understand before you start: the output PDF is image-based. This means:
- No text selection on any page. The non-redacted text is also part of the image, so it cannot be selected or copied either. If the recipient needs to quote a specific clause by copying text from the PDF, they will need to retype it, or you will need to provide a separate unredacted version for that purpose.
- No text search within the file. Command-F or Ctrl-F will not find text inside an image-based PDF. Screen readers for accessibility also cannot read the text.
- Slightly larger file size. Images tend to be larger than text encoded as vector data. The redacted PDF may be somewhat larger than the original, depending on the page complexity and render resolution.
These are not bugs. They are the direct consequence of the mechanism that makes the redaction secure. The absence of a text layer is exactly what guarantees the redacted content cannot be recovered. A properly redacted document is expected to be image-based: that is the correct behaviour. Courts, regulatory bodies, and compliance frameworks all accept image-based redacted PDFs. The trade-off is real but it is the intended design.
If you need selectable text on the non-redacted portions
Adobe Acrobat Pro's redaction feature has an option to apply OCR after redacting, re-adding a searchable text layer to the non-redacted portions. This is more sophisticated, but requires the Acrobat Pro subscription. For most use cases, the image-based output from a browser tool is entirely sufficient. If text selectability on the non-sensitive portions is a strict requirement for your workflow, that is the trade-off to be aware of.
All your PDF privacy tools, all in-browser
Redact sensitive text, split out pages, strip metadata, or blur faces in photos. Every tool runs locally in your browser. No server. No signup. No watermark.
FAQ
Is drawing a black box over text in a PDF the same as redacting it?
No. Drawing a black rectangle in Preview, Adobe Acrobat's annotation layer, Microsoft Word, or most PDF viewers adds a visual overlay on top of the text, but the original text remains in the file's data layer underneath. Anyone can select the text behind the box, copy it, or use a tool to remove the overlay entirely. Real-world leaks have happened this way: courts, government agencies, and law firms have accidentally published documents with this fake redaction. True redaction permanently removes the underlying content so there is nothing left to recover.
How does true PDF redaction work?
True redaction works by rendering each page of the PDF as a flat image, drawing the black boxes directly onto that image, and saving the result as a new PDF built from those images. Because the output is image-based, there is no text layer at all: nothing to select, copy, search, or extract. The redacted regions are literally gone from the file's data, not just hidden. SammaPix's redact tool does this entirely in your browser using the Canvas API and PDF rendering, with no server upload.
Can I redact a PDF without Adobe Acrobat?
Yes. Adobe Acrobat Pro has a redaction feature, but it requires a paid subscription (roughly 25 dollars per month). SammaPix's PDF redact tool at sammapix.com/tools/redact-pdf does the same thing, runs entirely in your browser, and is free. No account required, no watermark, and your file never leaves your device.
Does redacting a PDF remove metadata too?
Redacting the visible content of a PDF does not automatically strip the file's metadata: the author name, creation date, software used to create it, and any custom properties stored in the document. If you need to remove that information as well, use SammaPix's EXIF and metadata removal tool at sammapix.com/tools/exif after redacting. For the highest privacy, do both.
What is the difference between redacting a PDF and blurring a photo?
Redaction is the right operation for text-based documents: contracts, statements, reports, and legal filings, where you want to permanently remove specific text or regions. Blurring is typically used for photos or images, for example to hide a face, a license plate, or a screen in a screenshot. For photos, use SammaPix's blur and censor tool at sammapix.com/tools/blur-censor. For PDFs with sensitive text, use the redact tool. The underlying principle is the same: permanently remove the content rather than just covering it.
Is it safe to use an online PDF redaction tool?
It depends entirely on whether the tool uploads your file to a server. Most online redaction tools process your PDF on their servers, which means your confidential document, the very one you are trying to protect, travels over the internet and sits on a third-party machine. SammaPix's redact tool runs entirely in the browser. Your file is read locally, processed locally using the Canvas API, and downloaded directly from browser memory. No server receives the file at any point. You can verify this by opening your browser's network inspector while using the tool and watching that no outgoing request carries your document.
What are the most common documents people need to redact?
The most common cases are: contracts (removing pricing, party names, or proprietary terms before sharing a template), bank statements (blacking out account numbers and balances when submitting partial evidence), medical records (removing patient identifiers, diagnoses, or medication details), HR files (hiding salary figures, personal addresses, or disciplinary notes), legal discovery documents (redacting privileged attorney-client communications or third-party personal data), and government or court filings (removing names and identifying information of protected individuals). In all these cases the stakes of a failed redaction are high, which is why the black-box overlay mistake has caused real, publicised leaks.